LabLinks for Shopify: App Documentation
Everything that happens inside Shopify admin and on your storefront: installing the app, uploading and managing lab reports, enabling the theme blocks, and configuring the public lab results portal. For the lab-links.com web dashboard, see the Dashboard documentation.
1.Getting started
Install LabLinks from the Shopify App Store. After you approve the installation, the app opens a four-step setup wizard inside Shopify admin:
- Pick your industry. Choose Hemp, Food & Beverage, Supplements, Cosmetics, or General/Other. This selects the custom field template used for new lab reports.
- Set your branding. Enter your brand name and choose primary and secondary colors. These apply to your storefront badge and portal.
- Review your choices. Confirm the industry and appearance settings. You can change everything later in Display settings.
- Choose a plan. Select Free, Pro, or Business. Paid plans include a 14-day trial.
2.The dashboard
The dashboard is the app's home screen. Until your store is fully set up, it shows a getting-started checklist with the four steps that take a new install to a live storefront: enable the app embed in your theme, add the badge block to your product pages, upload your first lab test, and customize your portal.
Below the checklist, the overview cards show your lab report counts, broken out as total, passed, failed, pending, and archived, plus your lab report usage against your plan limit. Quick actions link to the most common tasks, and a recent lab tests list shows the latest reports you have added.
3.Managing lab reports
Click Add Lab Test to upload a new report. Use the product picker to link the report to a Shopify product, either a specific variant or All Variants. Upload the report file as a PDF, PNG, JPEG, or WebP up to 15 MB.
Each report carries these fields:
- Lab Name
- Test Date and Expiration Date
- Batch/Lot Number
- Status: Pass, Fail, Pending, or Archived
- Industry
- Custom fields from your industry template, in text, number, percentage, and pass/fail types
Custom field limits depend on your plan: 3 on Free, 25 on Pro, and 200 on Business.
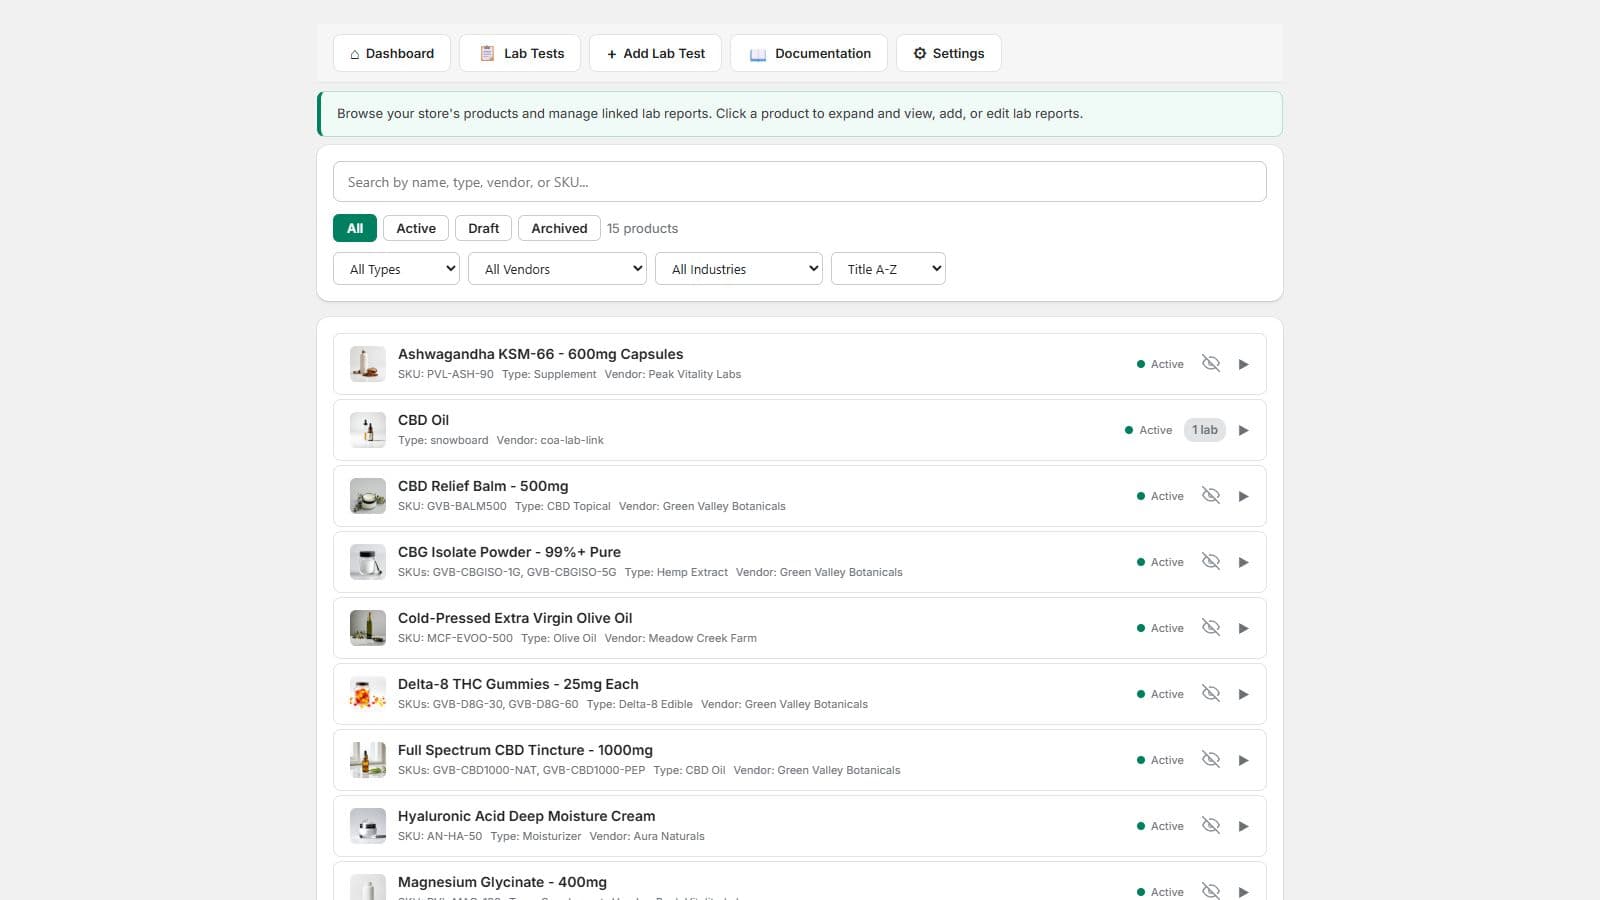
A product can hold multiple reports, one per batch, and one report per product can be marked as Default, which is the report the storefront badge opens.
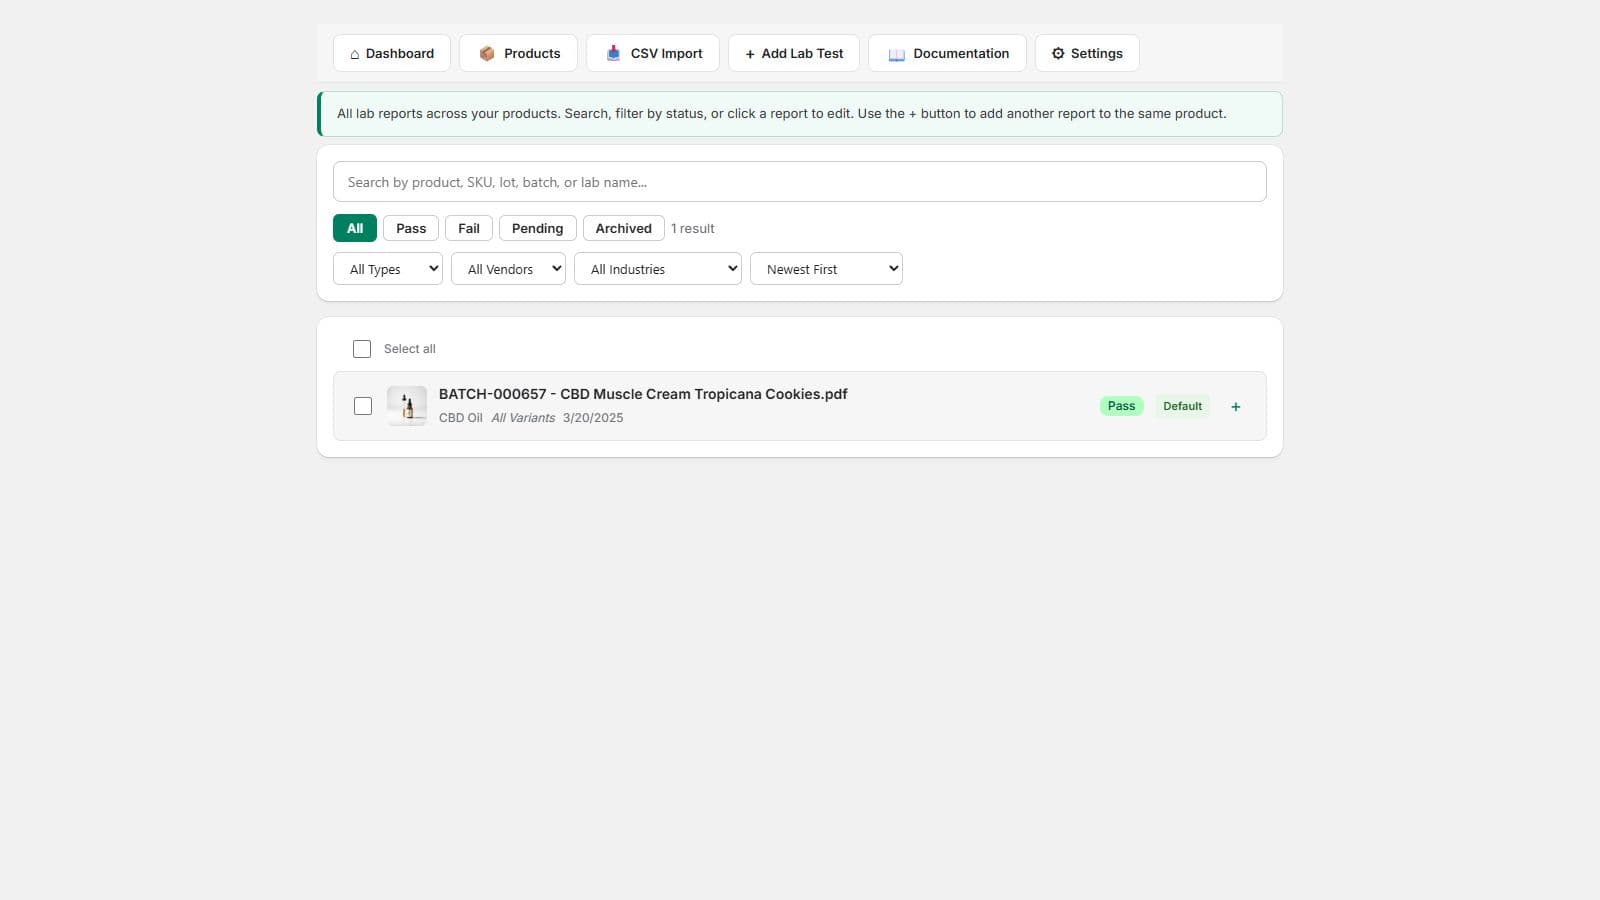
The lab test list supports search by product, SKU, lot, batch, or lab name; status filter buttons; type, vendor, and industry filters; and sort options. Select multiple reports to change their status or delete them in bulk.
4.Showing results on your storefront
LabLinks ships as theme app extension blocks, so you never edit theme code. Two steps put the badge on your product pages:
- Enable the LabLinks app embed. In Shopify admin, go to Online Store → Themes → Customize → Theme settings → App embeds and toggle LabLinks on.
- Add the Lab Test Product Badge block to your product page template in the theme editor, the same way you add any other section element.
The badge block has settings for badge color, text color, badge text, and a click-to-view popup toggle.
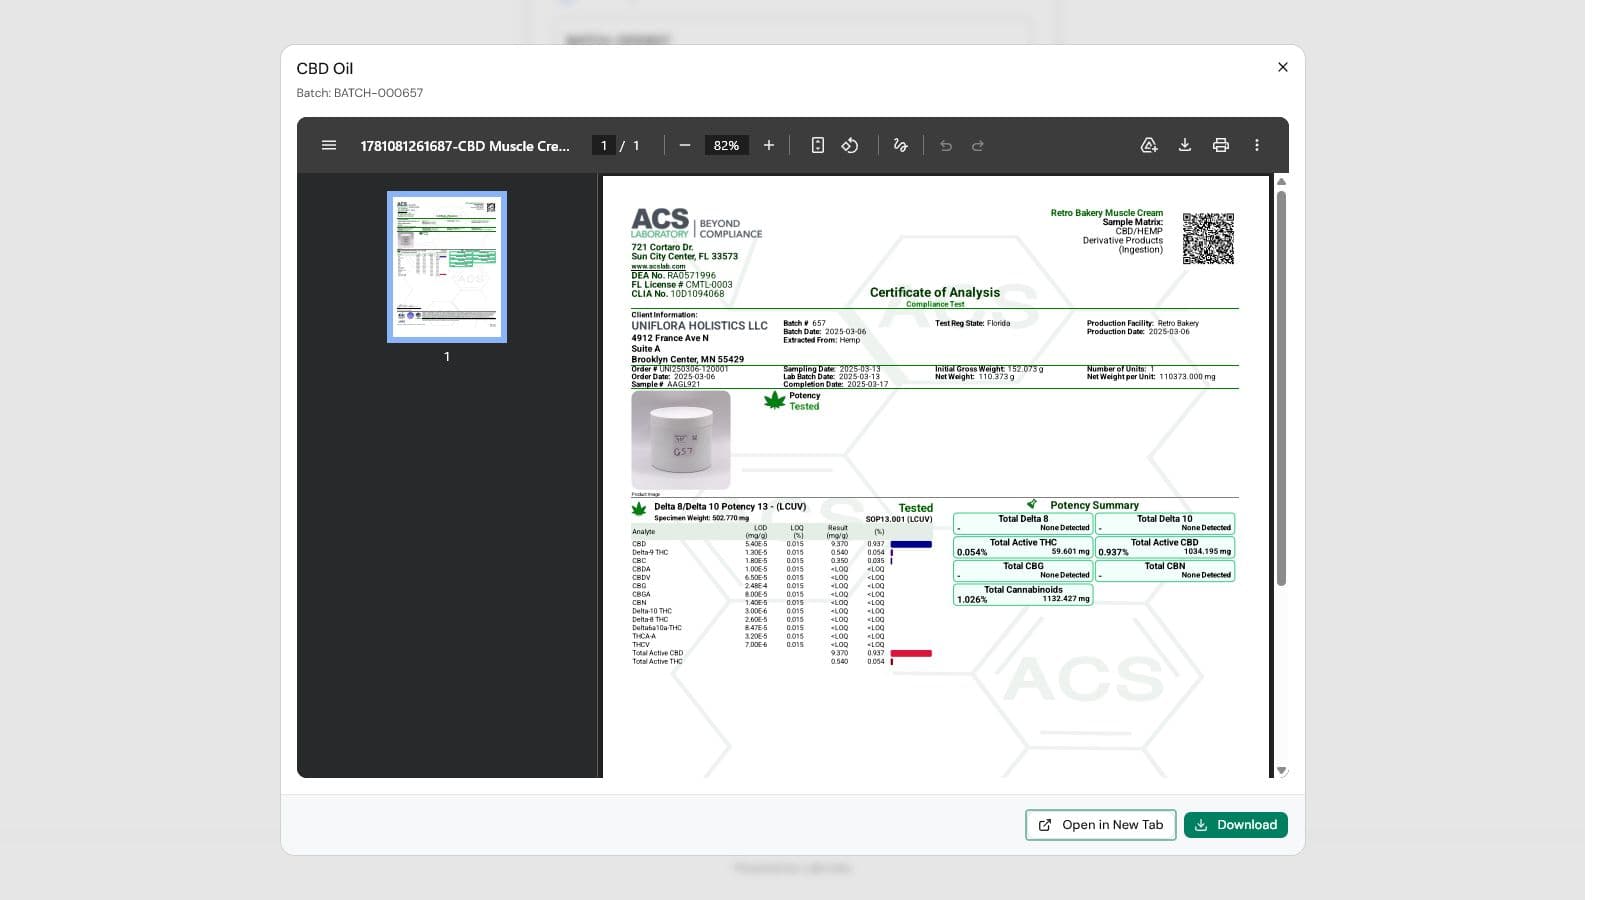
Two more blocks are available in the theme editor: a batch lookup search widget and a trust banner. With the popup toggle enabled, clicking the badge opens the full report in an overlay with an embedded PDF viewer, so the customer never leaves the product page.
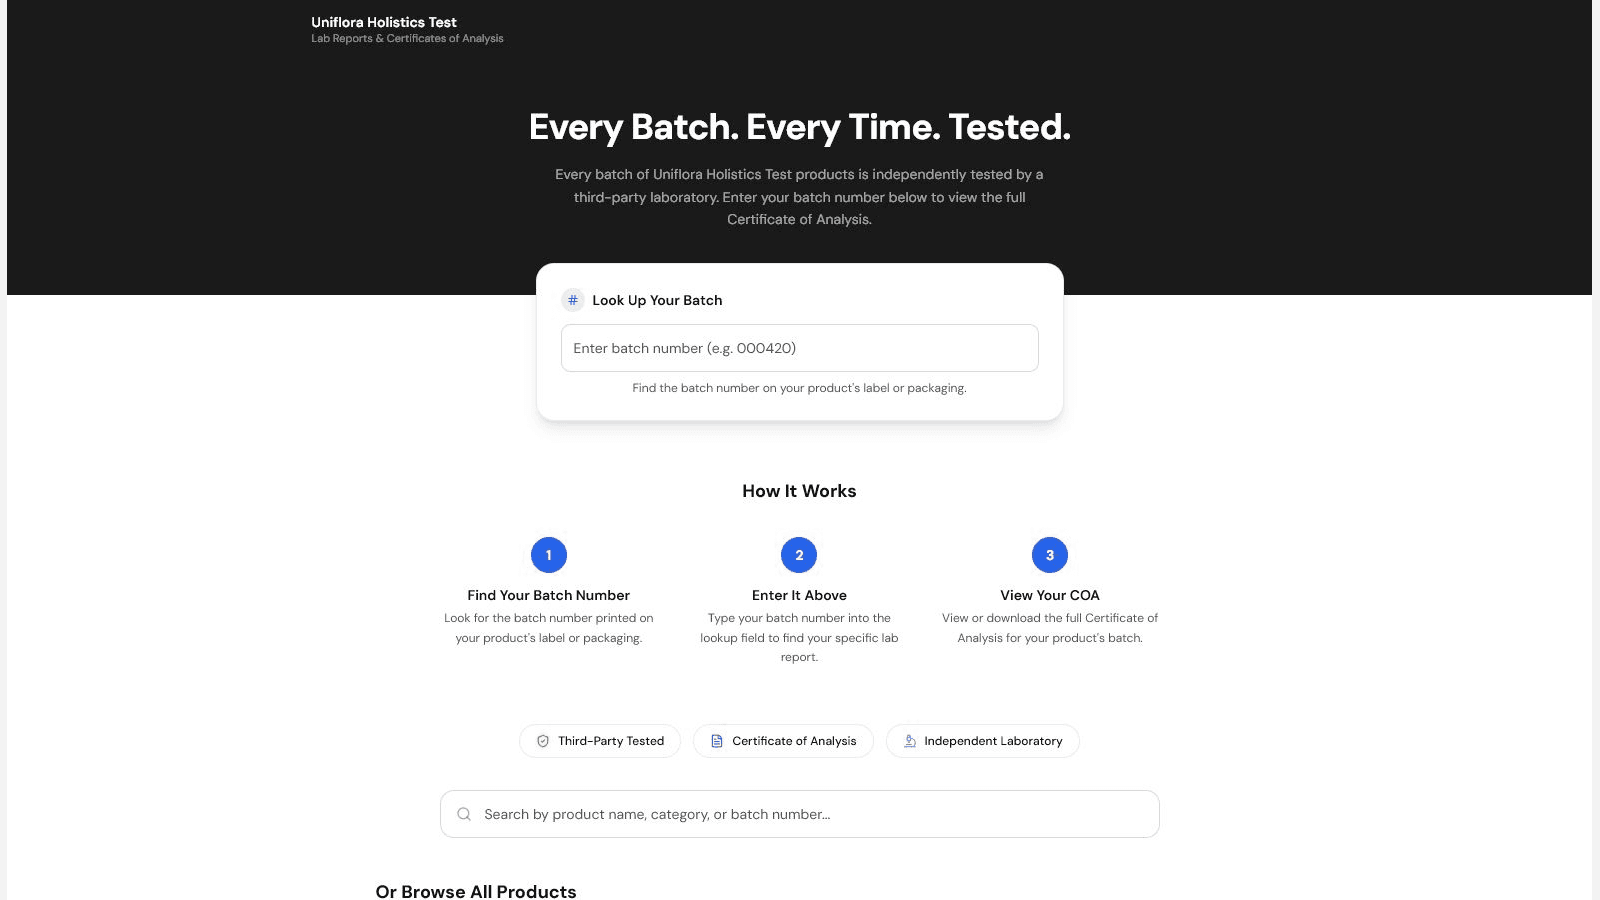
5.The lab results portal
Every store gets a searchable lab results portal at https://your-store.com/apps/lab-results. Visitors can search by product, batch, or lot number, and open any report in the viewer.
The portal also accepts direct links with ?product=, ?batch=, and ?q= parameters, so you can link to a pre-filtered view from emails, packaging, or QR codes.
6.CSV import
CSV import is available on the Pro and Business plans.
Import lab reports in bulk through a multi-step flow: choose your industry, upload a CSV, map columns (LabLinks auto-detects matching headers), preview the rows, then import. Each batch can import up to 250 rows.
Supported columns include product name, batch, lot, test date, expiration date, lab name, and status, plus columns for your custom fields.
Start with the template CSV if you want a clean header row:
Download LabLinks CSV template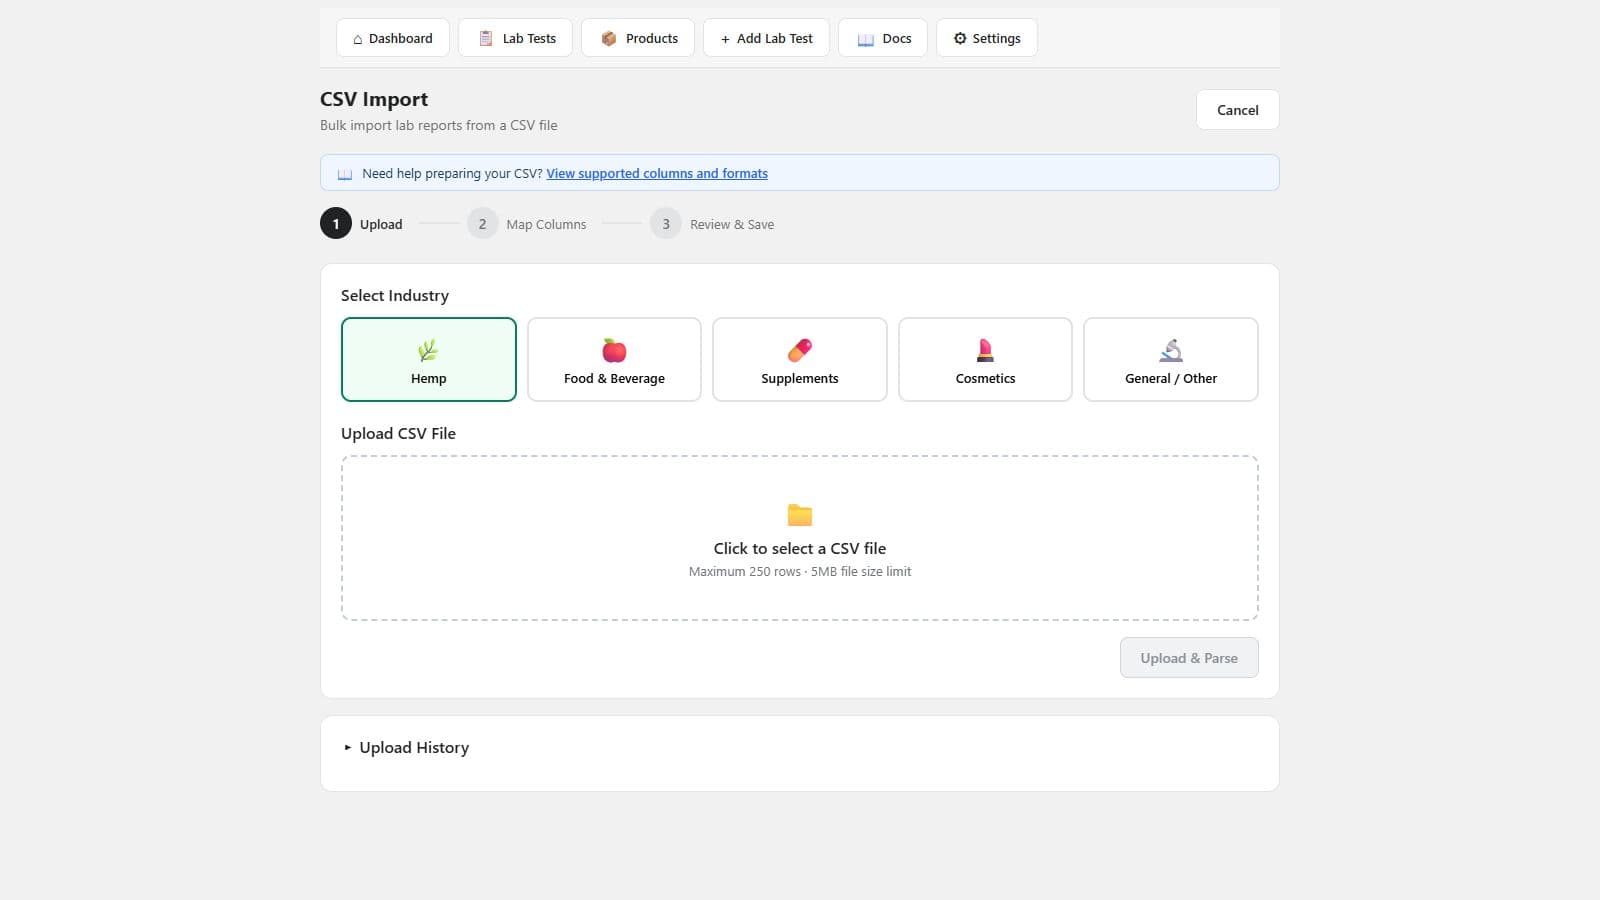
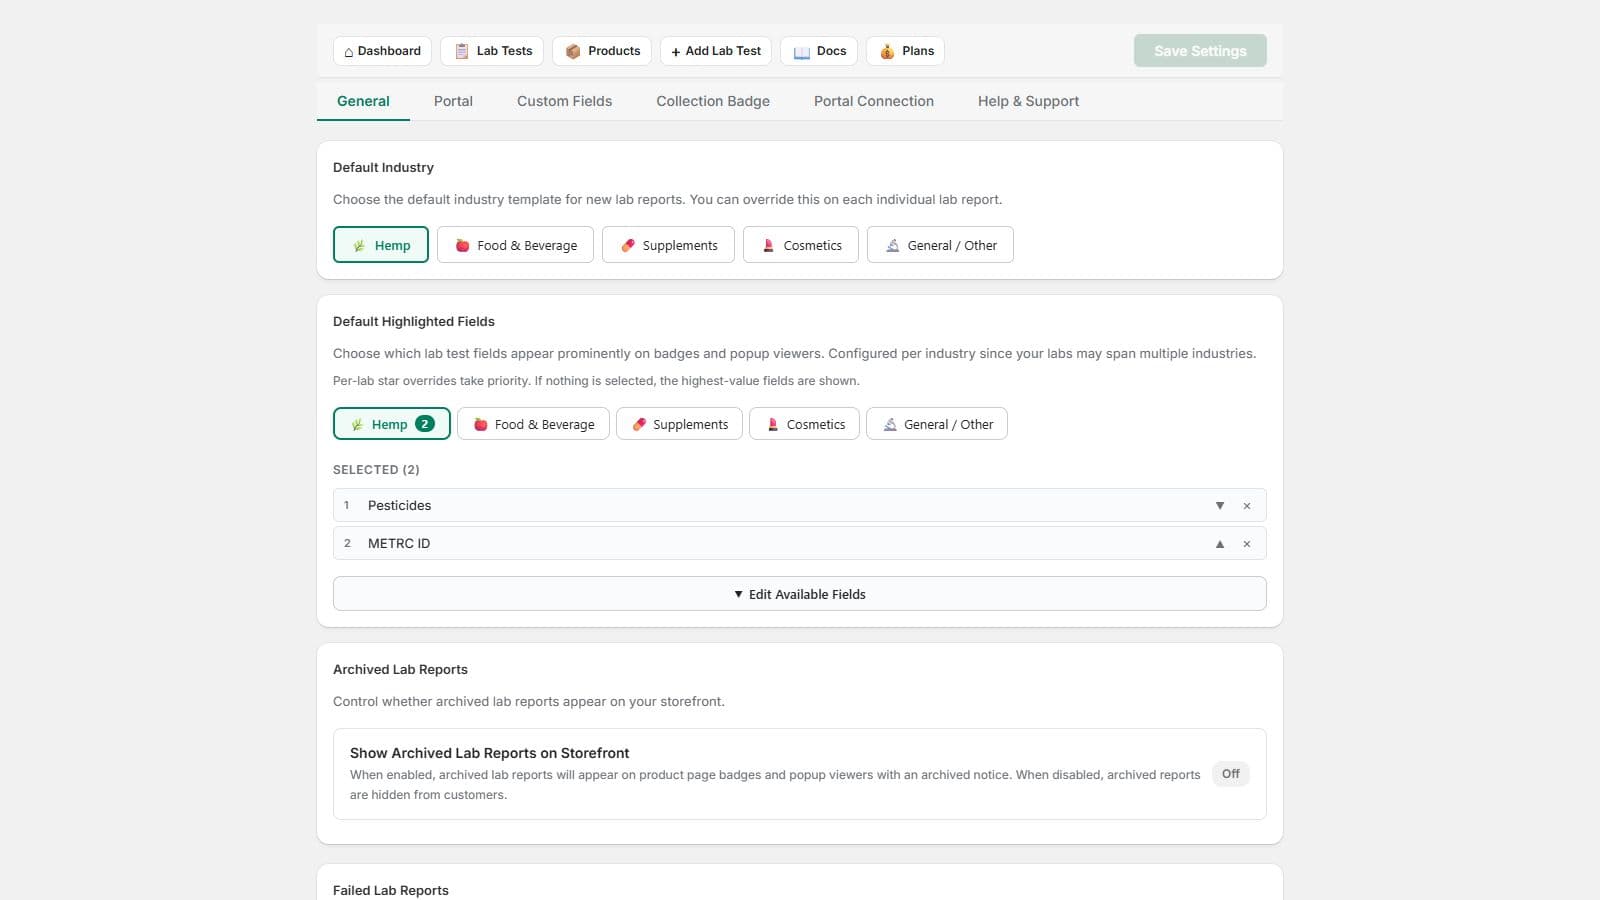
7.Display settings
Display settings control where lab results appear and how they look. Toggle each surface independently: the product page badge, collection badges, the portal page, and the popup viewer.
You can also set the portal title and description, and manage branding: colors and logo. The “Powered by LabLink” attribution shown on storefront components is removed on paid plans.
8.QR codes
QR code generation is available on the Business plan.
Generate a QR code for a specific lab report, a product, or your portal. Customize the colors and add a logo overlay, then download the code as PNG, SVG, or PDF for packaging and print. Scan counts are tracked so you can see how often each code is used.
9.Analytics
The analytics dashboard is available on the Business plan.
Analytics tracks report views, downloads, and QR scans, with trends over time. Export the data as CSV for reporting outside the app.
10.Plans at a glance
Paid plans include a 14-day trial. See Pricing for current pricing.
| Plan | Lab reports | Custom fields | Includes |
|---|---|---|---|
| Free | 5 | 3 | All display surfaces; “Powered by LabLink” attribution shown |
| Pro, $20/mo | 250 | 25 | CSV import, custom CSS, no attribution |
| Business, $50/mo | Unlimited | 200 | QR codes, analytics, custom domain, phone support |
Need help?
Email support@lab-links.com and we'll get back to you, or book a demo for a guided walkthrough.